DIY Simple Fall Garland

I made this little pom pom garland for my daughter who is away at college. The idea came from one I saw at Target. I bought some little lights to wrap around the garland and jumped right into making my version.
You need yarn in various fall colors. I used the cream yarn as the base by braiding three strands 3 yards each. Before beginning your braid, make a loop at the end (so you can hang your garland from a hook or nail). Secure the loop with a good knot and then you can begin braiding from there. It helps to loop the one end on a door handle to make braiding easier. When you get to the end of the braid, leave about 4-6 inches so you can make another loop and knot.
The other yarns for the pom poms were of differing thicknesses - some were very thin, some were sport yarns and the green and dark brown were more bulky.

There are many ways to make pom poms. You can buy a tool, make your own template from cardboard or use a fork. That was my intended method (hence the fork in the picture) because I knew I wanted smaller pom poms (about 2-3" in diameter). However, I found an even easier way with my fingers.

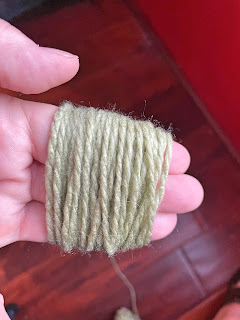
Start with holding the end of the yarn in the middle of your fingers and wind around your fingers 5 times to secure that end. I only used three fingers because I want my pom poms small.

At this point, the number of times you wind the yarn depends on the size of pom pom you want and the thickness of your yarn. Because I was using yarns of differing thicknesses, I wound around my fingers another 45-50 times for the thin or sport yarns and 35-40 for the medium thickness. When you're done winding, your hand will look like this:


Comments
Post a Comment